
 English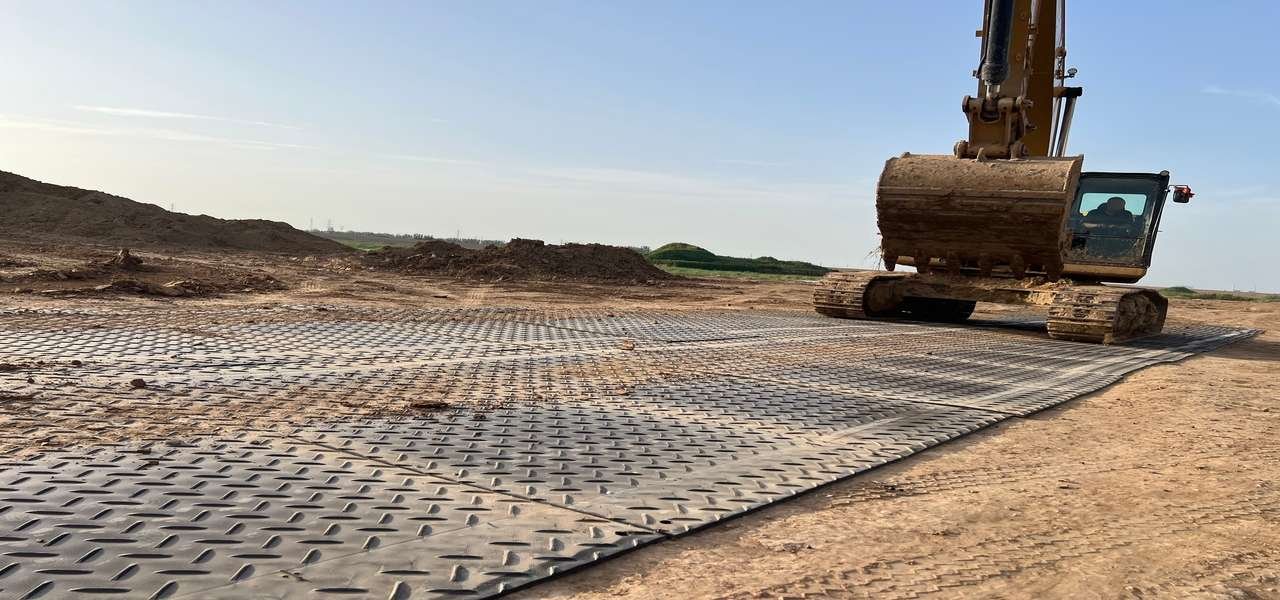
Ground Protection Mats Installation Guide: How to Lay, Connect, and Secure Mats Correctly
Ground protection mats are not only for covering the ground. They can also save your time, provide safer access, and reduce the need for repairs. When mats are laid correctly, trucks, lifts, equipment, workers, and pedestrians can move across the site without turning the ground into mud.
However, poor installation can lead to sliding, separation, sinking, or failure at turning points.
This guide shows you how to install ground protection mats properly, including how to plan the route, lay the mats, connect them, secure weak areas, test the route, and remove the mats after use.
How Ground Protection Mats Work
Ground protection mats work by distributing weight over a larger surface area. When heavy machinery, vehicles, or foot traffic move across soft ground, the mat helps spread the load and reduce direct pressure on the soil.
This helps prevent:
- rutting
- sinking
- turf damage
- muddy access routes
- unstable walking areas
- equipment getting stuck
That is why ground protection mats are often used for:
- construction sites
- landscaping projects
- temporary roads
- power line access
- oil and gas pipeline work
- outdoor events
- agriculture
- golf course maintenance
- lawns and turf protection
- temporary work pads
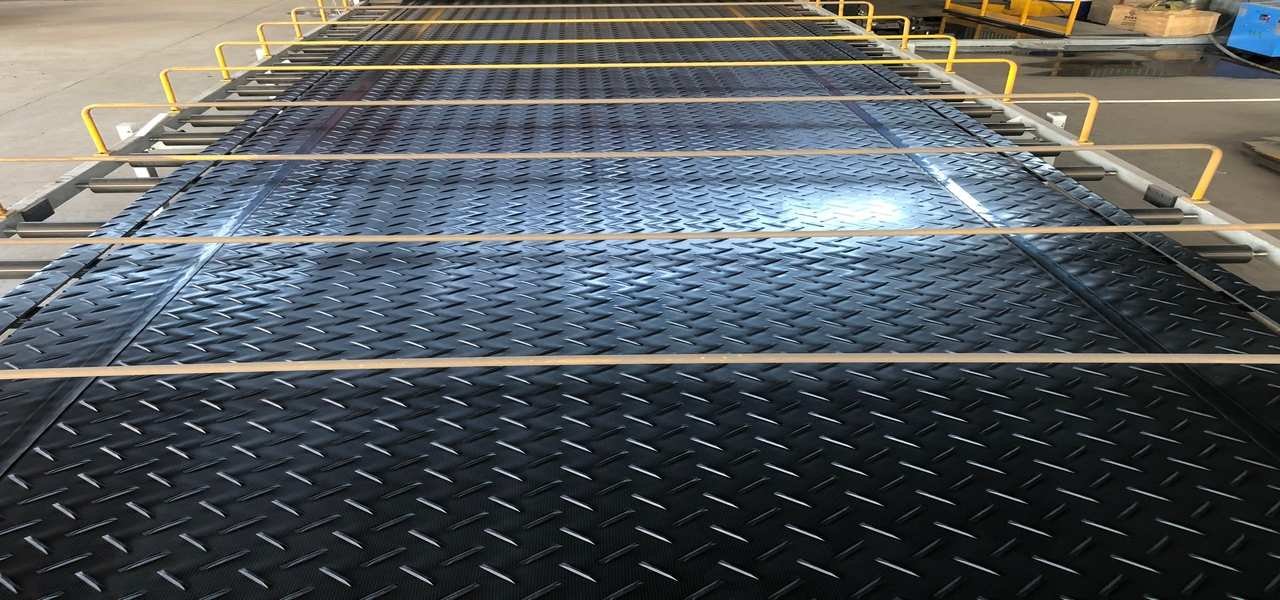
A good HDPE ground protection mat usually includes:
- traction surface
- hand holes
- connector holes
- sometimes anchor holes
The surface gives tires and feet better grip.
The hand holes help workers carry, lift, and place the mat.
The connector holes help lock multiple mats together.
The anchor holes help secure the mat system when needed.
How to Install Ground Protection Mats: 5-Step Guide
Installing ground protection mats is not only about placing panels on the ground. It is about controlling where vehicles and people move, reducing ground damage, and keeping the route stable during the job.
A good installation plan helps the mats perform better and reduces avoidable site problems.
Step 1: Walk the Site and Plan the Width
Before installing ground protection mats, inspect the entire route.
Check for:
- soft ground
- holes
- stones
- sharp debris
- broken concrete
- tree roots
- uneven areas
- wet grass
- muddy sections
- slopes
- turning areas
- loading zones
Large rocks and sharp fragments can damage mats under weight. Clear anything that may create pressure points under the mat.
Pay special attention to turning, stopping, reversing, and loading zones. These areas usually create more stress than straight driving.
Vehicle tires create sideways force when turning. That force can move mats, stress connector holes, and damage mat corners. Stationary or loaded equipment can also concentrate pressure in one place, so these areas often need more mats.
If you are working on a lawn, check how wet the grass is.
Dry lawns may work with a simple access path. Wet lawns usually need wider routes, more connectors, and slower vehicle movement.
Mats can spread load, but they are not bridges over unsafe or unsupported mud.
Practical Width Planning
| Use Situation | Practical Layout Direction |
|---|---|
| Pedestrian walkway | Narrower route may be enough |
| Garden cart or light hand tools | Low-profile pedestrian route |
| Pickup truck or small machinery | Full tire coverage required |
| Mini-excavator or skid steer | Wider route with turning space |
| Heavy equipment | Extra width and stronger layout |
| Wet lawn or mud | Wider route with connectors |
| Turning area | Use a wider pad, not only a narrow lane |
| Loading area | Add extra mats to spread pressure |
Do not calculate only the straight driving line. Add mats for entry points, turns, soft spots, loading zones, and working areas.
Step 2: Lay the Mats
Before laying the mats, check the tread surface.
Ground protection mats may have different surface designs:
- aggressive diamond tread for vehicles
- lower-profile texture for pedestrians
- one smooth side and one textured side
- dual-sided surface for mixed use
Different tread patterns are made for different uses.
For trucks, forklifts, and other wheeled equipment, the stronger traction side usually faces up. This helps tires grip the mat.
For pedestrian routes, events, or public access, a lower-profile walking surface may be more comfortable under foot.
For lawns and finished surfaces, you also need to consider which side is less aggressive against the ground.
When you are not sure, follow the supplier’s installation instructions.
Start from a stable entry point, such as:
- paved road
- compacted gravel entrance
- driveway
- firm hardstand area
Do not start in the middle of soft ground unless there is no other option.
Lay the first mat, then work forward in the direction of travel.
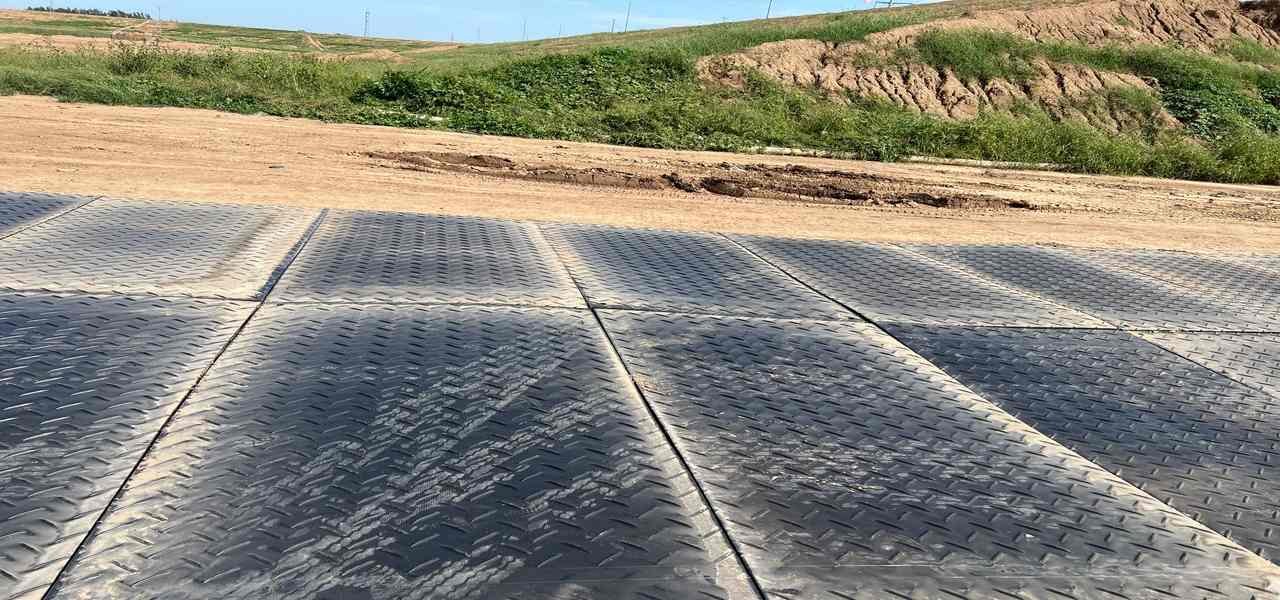
Place each mat flat on the ground. Push mats close together. Avoid overlaps and large gaps.
If the ground is soft or the traffic is heavy, consider a staggered layout so the seams do not all line up in one long joint.
Step 3: Connect and Anchor the Mats
Loose mats are only suitable for very light, short-term, low-risk use.
For vehicle traffic, repeated use, slopes, muddy ground, public access, or turning areas, connectors are strongly recommended.
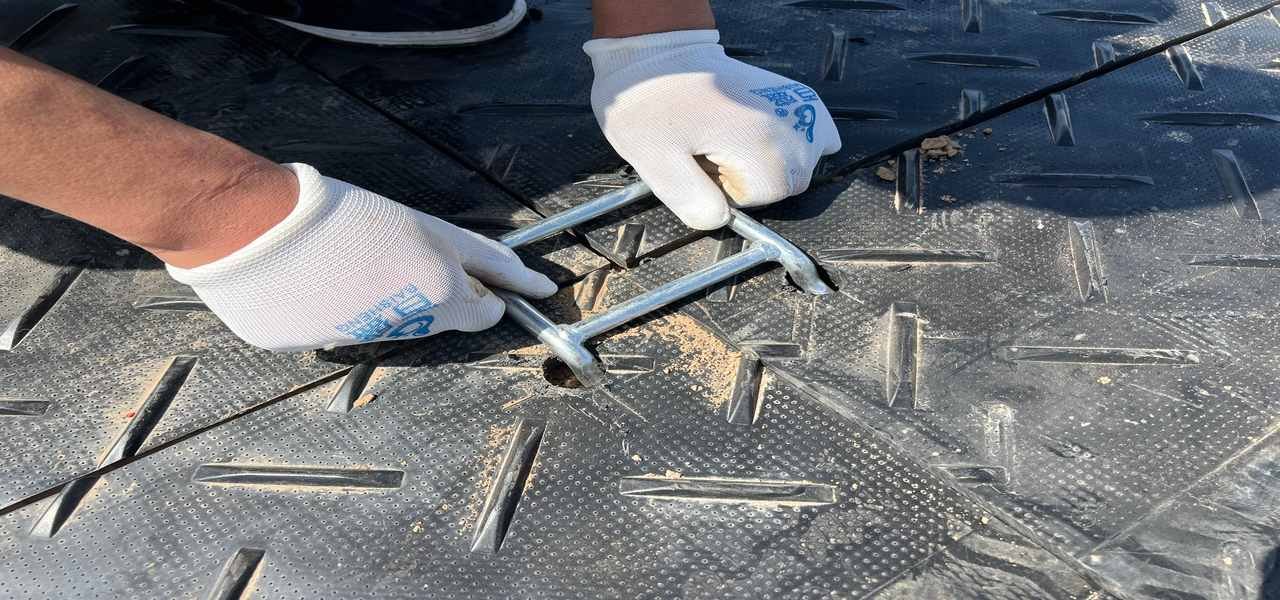
Connectors help ground protection mats work as one continuous surface. They reduce separation, gaps, sliding, edge lifting, and movement under traffic.
Common connector types include:
- simple pins
- locking links
- two-way connectors
- four-way connectors
- under-mat bolted connectors
- plate connectors
- pin-and-link systems
Most connectors fit into corner holes or connector holes near the mat edges.
Before fastening connectors, dry-fit the mats and align the holes. Do not force a connector through misaligned holes because this can damage the mat.
Avoid over-tightening bolted connectors unless the supplier specifically instructs you to do so. Over-tightening can reduce flexibility and create stress around the hole.
When Connectors Are Recommended
| Site Condition | Connector Need |
|---|---|
| Straight pedestrian path on firm ground | Optional |
| Short private walkway | Optional to recommended |
| Pickup truck access | Recommended |
| Forklift or equipment route | Strongly recommended |
| Muddy ground | Strongly recommended |
| Wet grass | Strongly recommended |
| Slopes | Strongly recommended |
| Turning areas | Strongly recommended |
| Public event routes | Strongly recommended |
| Long temporary roads | Strongly recommended |
| Repeated vehicle traffic | Strongly recommended |
When Anchors Are Needed
Anchors secure the mat system to the ground.
They may be useful for:
- slopes
- strong wind
- soft soil
- muddy ground
- repeated traffic
- long-term temporary routes
- areas where mats keep moving during testing
Anchor pins work well on soft ground. Hard surfaces may need another fixing method.
Before installing anchors, check for underground utilities, pipes, irrigation lines, and cables. This is especially important on lawns, farms, public sites, event areas, and utility projects.
Inspect anchors regularly during the job. Rain, loading, and repeated traffic can loosen them.
Step 4: Test the Route
After laying and connecting the mats, test the route before full use.
Walk the route first and check for:
- rocking mats
- raised edges
- open gaps
- loose connectors
- soft ground
- uneven transitions
- unstable turning areas
- exposed grass or mud edges
If permitted, run a light vehicle slowly over the route before heavy equipment enters.
Pay close attention to turning areas. If mats shift under a light vehicle, they will usually move more under a heavier machine.
Add connectors, anchors, or extra mats before the route gets worse.
Heavy equipment should move slowly. Avoid:
- sharp turns
- sudden braking
- tire spinning
- zero-radius turning
- fast reversing
- repeated turning on one narrow strip
These movements can displace mats and damage connectors.
Layout Should Match the Work Zone
Different areas need different layouts.
| Work Zone | Installation Focus |
|---|---|
| Straight paths | Keep mats aligned and flat |
| Turning sections | Add width and connectors |
| Crane areas | Use engineered support or outrigger pads |
| Pedestrian walkways | Keep surface stable and comfortable |
| Entrances | Add extra mats and check movement |
| Loading spots | Add more coverage for concentrated pressure |
| Dumpsters and material storage | Use wider pads |
| Gates and access points | Expect repeated traffic |
| Equipment staging areas | Use a stable working pad |
| Food stalls, ticket booths, restrooms | Add wider event coverage |
| Stage access | Use stronger mat layout for carts and equipment |
On construction sites, plan for wet and worst-case weather conditions. A route that works on dry ground may fail after rain.
Step 5: Remove and Clean the Mats
Good installation also includes good removal.
Remove mats carefully, especially on grass, pavers, decorative concrete, and finished surfaces.
Where possible, lift the mats instead of dragging them.
Remove connectors first. Keep connector pins, bolts, and plates in a container during removal so they are not lost in mud.
Clean mud, stones, and debris from the mats before storage. If you stack dirty mats, stones can scratch the next mat. Mud also adds weight and makes handling harder.
Store mats flat when possible.
If mats must be stored vertically, support them properly so they do not bend over time.
Keep mats away from:
- unnecessary heat
- sharp edges
- careless forklift handling
- heavy impact
- unstable storage stacks
How to Choose Mats That Are Easier to Install
The right mat is not only about load capacity. It should also fit your installation method, crew size, surface condition, and reuse plan.
Consider these details before choosing mats:
| Mat Feature | Why It Helps Installation |
|---|---|
| Hand holes | Makes lifting, carrying, and placement easier |
| Suitable tread pattern | Reduces slipping for the intended traffic |
| Connector holes | Allows mats to work as one connected route |
| Anchor holes | Helps secure mats on slopes or soft ground |
| Controlled thickness | Improves layout stability and handling |
| Proper flexibility | Helps mats follow normal ground variation |
| Stronger body design | Better for repeated industrial access |
| Easy-clean surface | Saves time after muddy jobs |
| Stackable shape | Helps transport and storage |
| Clear size options | Makes route calculation easier |
For rental businesses, choose mats that can survive repeated installation, removal, cleaning, transport, and storage.
For construction, focus on load, ground condition, and turning areas.
For events, focus on visitor safety, lawn protection, fast installation, and fast removal.
For landscaping, focus on turf protection, easy handling, and rut prevention.
At BKM, we normally ask about the real job before recommending a mat:
- What vehicle or equipment will pass over it?
- Is the ground grass, clay, mud, gravel, sand, or concrete?
- Will the mats be used once or rented out many times?
- Will vehicles turn, reverse, or stop on the route?
- Do you need connectors?
- Do you need anchor holes?
- Do you need a specific surface pattern?
This information helps you avoid buying a mat that looks right in photos but performs poorly on site.
When Ground Protection Mats Are Not Enough
Ground protection mats can solve many temporary access problems, but they also have limits.
If the ground is extremely soft, unstable, or waterlogged, or unable to support the load, you may need a different mat system or additional ground preparation.
Do not use standard ground protection mats as bridges over:
- deep holes
- trenches
- septic systems
- unsupported voids
- broken slab areas
- weak utility covers
- hollow ground
Mats spread load, but they still need support underneath.
For cranes, outriggers, concrete pumps, and high point loads, you may need:
- crane outrigger pads
- engineered mats
- crane pads
- site-specific load plans
- ground bearing pressure checks
If the project has safety risks, get professional input before installation.
It is much cheaper to check first than to recover a stuck machine later.
FAQ About Ground Protection Mats Installation
Can ground protection mats be used as temporary road mats?
Yes. You can create a temporary access road by laying mats in a continuous route and connecting them where needed.
Which side of a ground protection mat should face up?
Use the vehicle traction side for trucks and machines. Use the pedestrian-friendly side for walkways when the mat has different surface patterns. Always check the mat design before installation.
How do you lay ground protection mats on mud?
Start from firm ground and work forward. Remove sharp debris, place mats flat, keep edges tight, and connect the mats before vehicles pass over them. On deep mud, use a wider route and test with a lighter vehicle first.
How do you install ground protection mats on grass?
Place the mats carefully instead of dragging them. Use connectors if vehicles, carts, or crowds will pass over the route. Remove the mats as soon as the route is no longer needed.
Do ground protection mats need connectors?
For vehicle access, repeated traffic, slopes, public walkways, muddy ground, or turning areas, yes. Connectors are strongly recommended to reduce separation, sliding, and weak edges.
How do you stop ground protection mats from moving?
Use the correct layout, connect the mats, add anchors where needed, and avoid sharp turns or tire spinning. If mats still move during testing, widen the layout or add more fixing points.
Can ground protection mats replace plywood?
Yes, in many temporary access applications. HDPE ground protection mats are easier to clean, more weather-resistant, and more reusable than plywood.
How many mats do I need for a project?
Measure the full route length and width. Then add mats for turning areas, entry points, loading zones, soft spots, and working pads. Do not calculate only the straight driving line.
Can heavy equipment drive over ground protection mats?
Yes, but you should choose mats suitable for the load and ground condition. Use the right layout, connectors, and sometimes anchors. For cranes or high point loads, check whether outrigger pads or engineered mats are required.
Conclusion
Ground protection mats are easy to understand, but real installation needs planning.
You need to read the ground, design the route, choose the correct surface side, connect the panels, secure weak areas, and test before full use.
A good mat matters. A good installation makes the mat valuable.
When you install the mats properly, you can protect lawns, reduce mud, keep trucks moving, improve site access, and avoid costly repairs.
BKM provides ground protection mats with different sizes, surface textures, hand holes, connector holes, anchor hole options, and custom requirements for construction, landscaping, events, agriculture, and temporary access projects.